最近项目上要使用Vue3,为了快速适应新的版本,学习并记录一些语法细节,让自己能够更好的深入理解。不过不得不感叹现在的AI辅助变成真的太厉害了,Tab键一按,基本上就能生成想要的页面结构,真的好懂我啊,不过为了自己能够更加熟悉这些,我还是选择自己一个个输入内容。
我打算通过打磨一个简易的vue-blog小项目来学习并了解Vue3
1 安装NVM(Vue新老版本对node版本要求不一样,方便切换)
2 通过NVM查看当前可以使用的node版本
nvm list available
安装最新的稳定版本,比如22.17.1
nvm install 22.17.1
nvm use 22.17.1
3 创建一个基本的模板
npm create vite@latest vue-blog -- --template vue
cd vue-blog
npm install
npm install vue-router@4
npm run dev
4 项目的目录结构
src/
├── components/         # 通用组件,如文章卡片
├── views/              # 页面视图
│   ├── HomeView.vue
│   ├── PostView.vue
│   └── EditorView.vue
├── router/             # 路由配置
│   └── index.js
├── data/               # 模拟的文章数据
│   └── posts.js
├── App.vue
└── main.js
5 配置Vue Router
源文件: src/router/index.js
import { createRouter, createWebHistory } from 'vue-router';
import HomeView from '../views/HomeView.vue';
import PostView from '../views/PostView.vue';
import EditorView from '../views/EditorView.vue';

const routes = [
 { path: '/', name: 'Home', component: HomeView},
 { path: '/post/:id', name: 'Post', component: PostView},
 { path: '/editor', name: 'EditorView', component: EditorView}
];

export default createRouter({
    history : createWebHistory(),
    routes
});
vue-router是Vue官方提供的路由管理库,用于管理Vue应用中页面之间的跳转(路由导航)。Vue3中vue-router的版本是v4,采用了Composition API 风格和新的创建方式。
从第一行代码中可以看到多了两个引入createRouter和createWebHistory
🔧 createRouter
这是一个函数,用来创建一个路由实例,需要传递给它配置对象,包括:
history:路由模式,比如hash或者history模式
routes:定义的路由数组,通常每个route对应一个页面
比如上面定义的routes中的第一行
path: '/', name: 'Home', component: HomeView
这个定义了名为Home的页面,路径为/,对应的组件为HomeView。
🌐 createWebHistory
表明使用了HTML5的history模式,路径中不带#号。
History和Hash模式(传统方式)区别:
在 Web 页面中,网址后面的一部分用来表示“当前访问的是哪一页”,这就是“路由”。
举例:
http://example.com/#/about—— 带#,这是 hash 模式http://example.com/about—— 不带#,这是 history 模式
Vue Router 提供了两个函数让你选择用哪种模式:
createWebHashHistory()—— 使用 hash 模式(带#)createWebHistory()—— 使用 HTML5 的 history 模式(不带#)
源头文:src/main.js
import { createApp } from 'vue'
import App from './App.vue'
import router from './router'

createApp(App).use(router).mount('#app')
导入的createApp函数它是Vue3的入口函数,用来创建应用实例(App)
PS: Vue2中是使用new Vue()创建,Vue3中改为CreateApp(),虽然这个通过单词语义以及其语法结构可以直接明白它的作用,但是既然是新的,还是要扫盲搞清楚原油。基本上这个页面后续只是用来引入新的插件时才会改动。后面三行的意思是加载根组件App.vue,导入router,最后整体“链式调用”,创建一个App应用实例,使用路由,并挂载到HTML中#app这个DOM元素上。
[main.js]
   ↓
createApp(App)
   ↓
.use(router)       ← 注册路由
   ↓
.mount('#app')     ← 渲染到页面中
6 造一些博客数据,后续再逐步迭代成调用Markdown格式
export const posts = [
  {
    id: 1,
    title: "Vue 3 入门",
    content: "这是第一篇文章,讲的是 Vue 3 的基础知识,包括组件、指令和响应式系统。",
    createdAt: "2025-07-28"
  },
  {
    id: 2,
    title: "使用 Vite 快速启动项目",
    content: "Vite 是一个轻量且快速的构建工具,适合 Vue 3 项目。",
    createdAt: "2025-07-27"
  },
  {
    id: 3,
    title: "Hello World",
    content: "这是一篇关于Vue3的学习入门小项目",
    createdAt: "2025-07-26"
  }
];
7 首页 HomeView.vue
<template>
  <div>
    <h1>我的博客</h1>
    <ul>
      <li v-for="post in posts" :key="post.id">
        <router-link :to="`/post/${post.id}`">{{ post.title }}</router-link>
      </li>
    </ul>
    <router-link to="/editor">➕ 写新文章</router-link>
  </div>
</template>

<script setup>
import { posts } from '../data/posts.js';
</script>
8 文章详情页PostView.vue
<template>
  <div v-if="post">
    <h2>{{ post.title }}</h2>
    <p>{{ post.content }}</p>
    <p><small>{{ post.createdAt }}</small></p>
  </div>
</template>

<script setup>
import { useRoute } from 'vue-router';
import { posts } from '../data/posts.js';

const route = useRoute();
const post = posts.find(p => p.id == route.params.id);
</script>
<script setup> 是 Vue 3 引入的一种更简洁的写法,专为 Composition API 设计。 它相比传统的写法更加直观、简短、性能更高,省去了很多模板代码。没有 export default 也没有 setup() 函数,所有变量自动暴露给模板 <template>,写法更清晰、文件更短。
9 文章编辑页EditorView.vue
<template>
  <div>
    <h2>写一篇新文章</h2>
    <input v-model="title" placeholder="标题" />
    <textarea v-model="content" placeholder="内容"></textarea>
    <button @click="save">保存</button>
  </div>
</template>

<script setup>
import { ref } from 'vue';
import { posts } from '../data/posts.js';
import { useRouter } from 'vue-router';

const title = ref('');
const content = ref('');
const router = useRouter();

const save = () => {
  posts.push({
    id: Date.now(),
    title: title.value,
    content: content.value,
    createdAt: new Date().toISOString().split('T')[0]
  });
  router.push('/');
};
</script>

<style scoped>
input, textarea {
  display: block;
  width: 100%;
  margin: 10px 0;
}
</style>
ref:Vue 的响应式工具,用于定义响应式数据(title 和 content)
posts:从外部导入的文章数组(假设是内存模拟数据库)
useRouter():Vue Router 的导航方法,用于编程式跳转页面
const title = ref('');
const content = ref('');
创建两个响应式变量:标题和内容,初始为空字符串
它们与<input> 和 <textarea>双向绑定
在 Vue 3 中,ref() 是用来创建“响应式变量”的函数。
它的作用是:让一个普通的值(比如字符串、数字)变成可以响应变化的值,这样 Vue 就可以自动追踪它的变化并更新视图。
const message = ref('你好')
//这就创建了一个响应式变量 message,它的值是 '你好',你可以像这样使用:
console.log(message.value) // 输出 "你好"
message.value = '再见'     // 改变它的值
//ref 包装的值,要用 .value 来取值或赋值
双向数据绑定:
<input v-model="message" />
           ⇅
     const message = ref('')
10 启动项目,并访问
npm run dev
//浏览器打开
http://localhost:5173
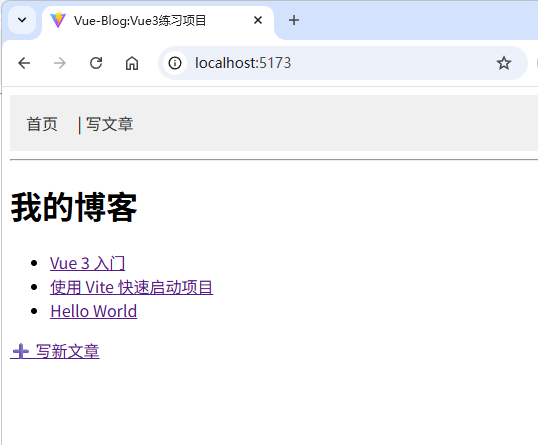
这样一个使用Vue写的基本的Blog前端小项目就完成了,整体的效果比较简陋,后续再引入elemeentUI Plus等框架进行美化。整体效果如下:
博客主页
博客详情页

写博客
